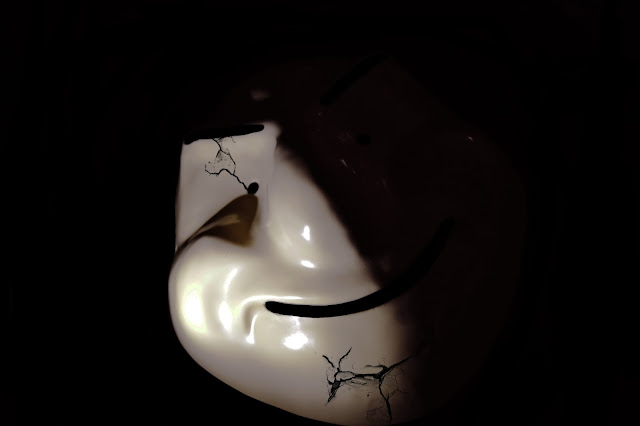
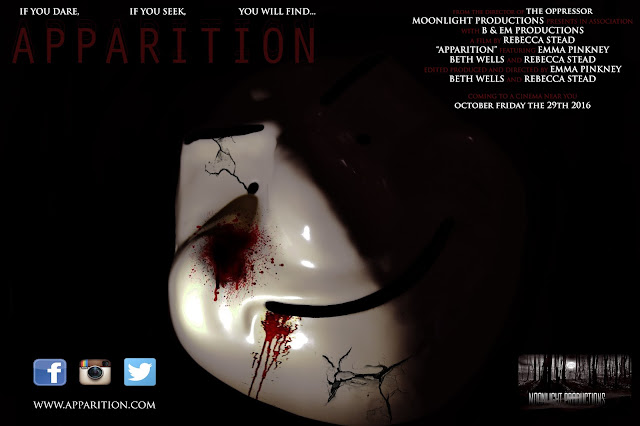
You can see in the image the transformation of my image. You will now be able to see the entire process from the beginning of my poster to the final product.
The first thing I decided to do was to brighten the image and contrast it. This made the light brighter and the background appear darker. The next thing I decided was to add cracks to the mask to give it a worn look and appear that it is not completely invincible.
 |
| Step 1 |
I the concluded that the mask needed more and following this theme of the mask not being invincible, I thought to add blood. This masks the audience ask whether the blood is of the antagonist or of its victims.
 |
| Step 2 |
Once I believed that image was complete, I decided to add the text that would be placed around it. Following my layout design the title and slogan was to be at the top left of the page. I used the effect on the main title that I had earlier created and placed the slogan to fit the same size as the title.
 |
| Step 3 |
I had to look back on my poster research for my nest step to discover what I needed to include in my production information section. I also needed to remind myself which parts of the text needed to stand out more from the rest. Once I found this information I set about writing up the production information.
 |
| Step 4 |
Once the production information was finalized, I realised I need social networks and websites to be included that would effectively help with promotion of film. I decided to create a simple website address and use the social networking sites of Facebook, Instagram and Twitter and placed them together in the bottom left corner. I also discovered I needed my production company logo to be included and therefore placed it on the opposite side.
 |
| Step 5 |
The final step was to add star ratings for my film. When asked, I was told to use THE TIMES and THE GUARDIAN which are popular newspapers to rate films. I then gave my film 5 ratings by each of the companies as this catches the audiences attention by the impressive stars.


